
Sitecore Websites relies in a Secure Connection , and sometimes we need renewing those certificates, however we may face some issues during this process
Understanding the Symptom
The developer run powershell script in order to create a new Self signed Certificate
New-SelfSignedCertificate -CertStoreLocation Cert:\LocalMachine\My -DnsName "*.dev.local" -FriendlyName "dev.local" -NotAfter $([datetime]::now.AddYears(5))The developer open “Manage computer certificates”:

The Certificate is moved or copied(CTRL) from “Intermediate Certification Authorities” to “Trusted Root Certification Authorities”
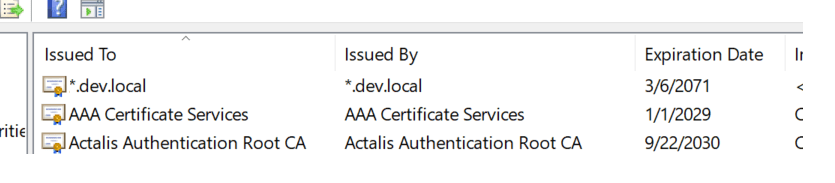
The Certificate Icon does not contain a “key icon”
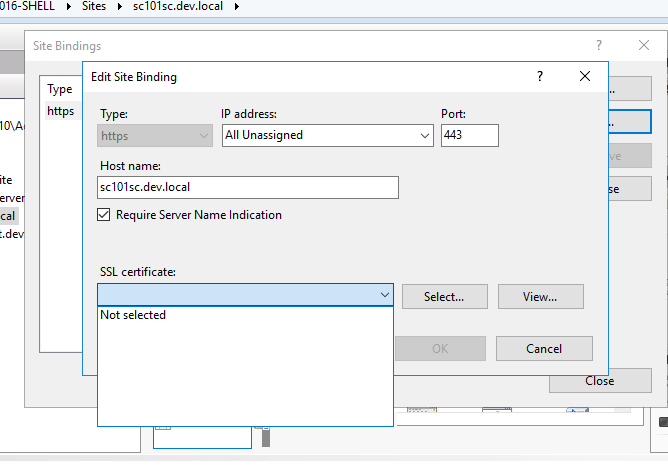
Issue: after Creating a Self Signed Certificate, It’s not showing in IIS
SOLUTION
Create a new powershell script called “Create SelfCert.ps1”
Paste the following code
$certFilePath = "C:\Temp"
$certStoreLocation = "Cert:\LocalMachine\My"
$pwd = "password"
$cert = New-SelfSignedCertificate -KeyFriendlyName "Development Cert" -KeyDescription "Development Cert" -KeyAlgorithm "RSA" -DnsName @("*.dev.local", "localhost") -NotBefore (Get-Date).AddYears(-1) -NotAfter (Get-Date).AddYears(50) -KeyUsage CertSign, CRLSign, DataEncipherment, DigitalSignature, NonRepudiation -KeyUsageProperty All -KeyLength 2048 -CertStoreLocation $certStoreLocation -KeyExportPolicy Exportable -KeyProtection None -Type Custom
$certThumb = $cert.Thumbprint
$certPath = "$certStoreLocation\$certThumb"
$cert | Export-PfxCertificate -FilePath "$certFilePath\$certThumb.pfx" -Password (ConvertTo-SecureString -String $pwd -AsPlainText -Force)
When you try to run this Script, you face PROBLEM 2, if you don’t face this issue, jump “problem 2”
PROBLEM 2
Powershell, gives you the following message:
“Create SelfCert.ps1 is not digitally signed. You cannot run this script on the current system. For more information about running scripts and setting execution policy, see about_Execution_Policies at https://go.microsoft.com/fwlink/?LinkID=135170”
Run the following powershell command
Set-ExecutionPolicy
Supply values for the following parameters:
ExecutionPolicy: Unrestricted
Let’s get back to PROBLEM 1
Run the script Create SelfCert.ps1, this will generate a key in “C:\TEMP”
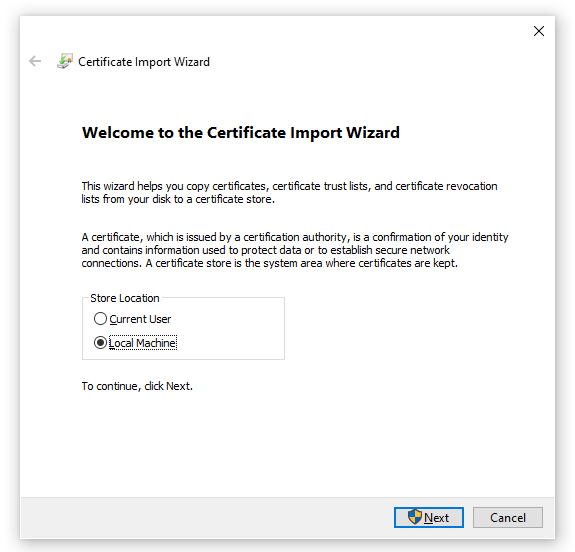
Open the file in order to import the Certificate

Select “Local Machine”
Type the password :“password”, this was previously set in the script
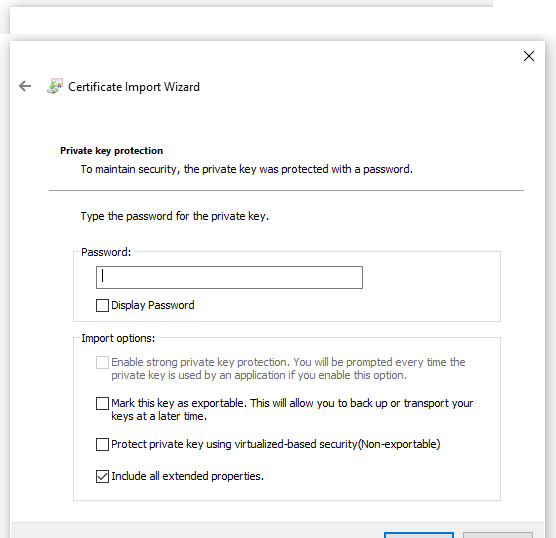
After you import the Certificat
Make sure you have the Certificate in 2 places
1)”Personal/Certificates” (you will need to copy over, drag holding CTRL)
2)Trusted Root Certification Authorities/Certificates
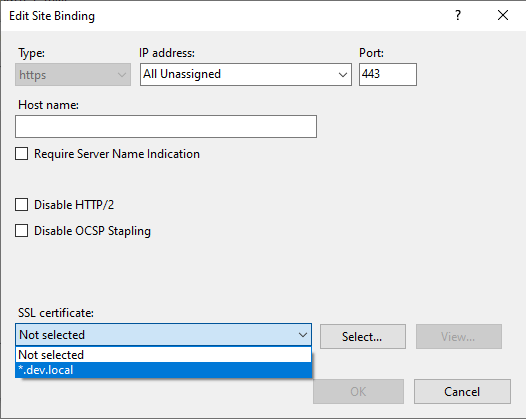
as we can see, the icon of the Certificate contains a “key”, and now, check IIS and you will see

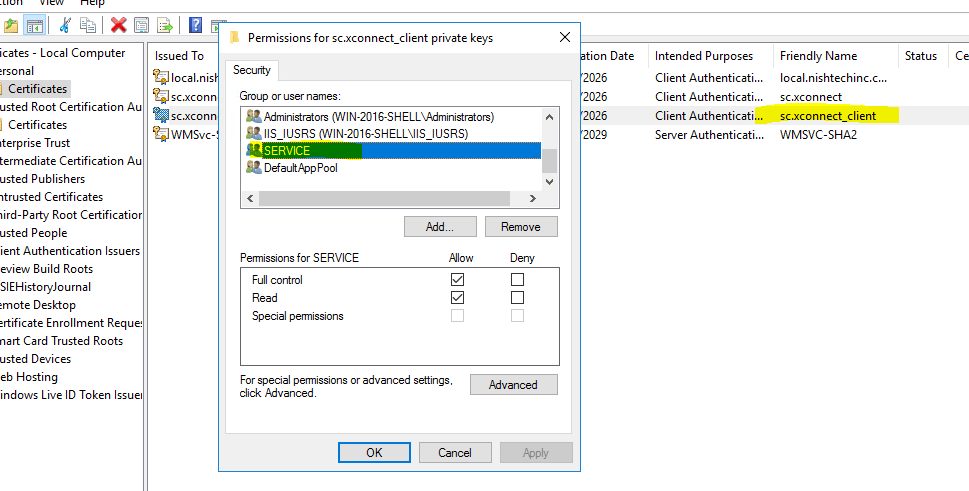
3)Don’t forget to add the App_Pool and IIS user Permissions on the new Certificate (*.dev.local)
Right click – > All Tasks – > Manage Private Keys and add the Permissions for the Users(iis apppool\<app poolname>
Now check IIS, and you will see the Certificate

You must be logged in to post a comment.