
If you’re enthusiastic about Sitecore, you probably already know that the ASP.NET Core Rendering SDK is available starting with Sitecore 10.
This is the first article in a series that will explore this topic in depth.
But before jumping straight in, let’s take a step back and get hands-on with ASP.NET Core by creating and exploring a website!
We’ll also discuss and compare some key differences between a regular ASP.NET website and an ASP.NET Core website.
Creating our new website
Create the application pool
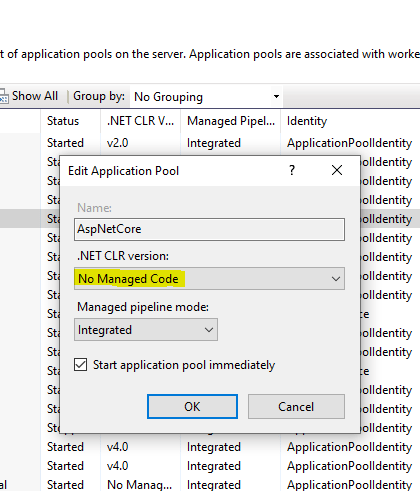
The first step actually will be to create a new Application Pool, open IIS , click “Application Pools” and create a new one called “AspNetCore“
Here it’s the first different step, in this case, you should select “NO MANAGED CODE”
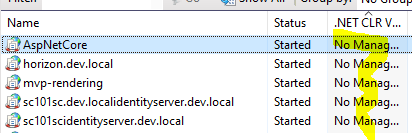
If you’re familiar with Sitecore, you might have noticed some similarities with other application pools already on your machine.
For example, the Identity Server runs using “No Managed Code.”
Create the website
Here the procedure it’s the same that you are already familiar with
Fill all the fields, create the directory , and the most important part, select the correct “Application pool”
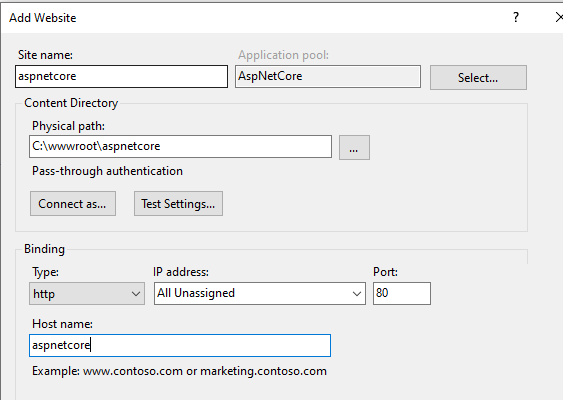
don’t forget to add the entry to your hosts file
127.0.0.1 aspnetcore
Creating our new Project
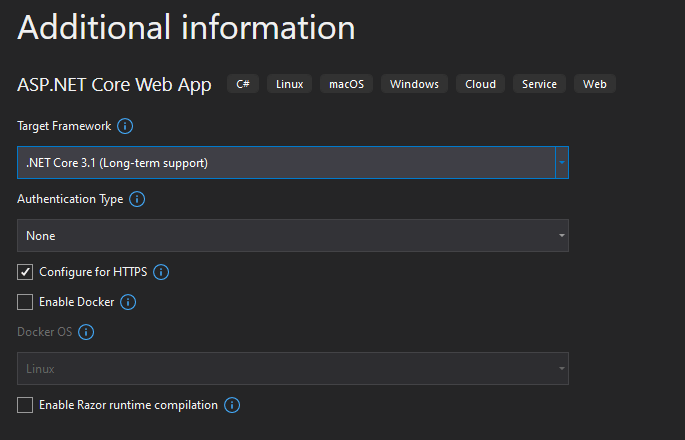
Open Visual Studio , and type “Core”, be select the “ASP.NET CORE WEB APP”, if this template is not available for you, you might download direct from Visual Studio.
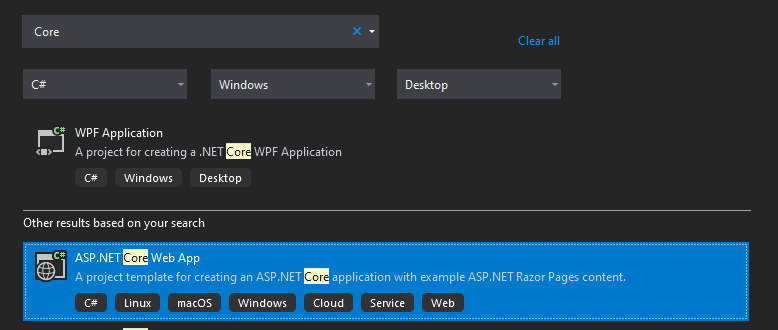
Follow the Wizard and Note that our Target Framework it’s “.NET CORE 3.1“
After you finished the Wizard you will see your project
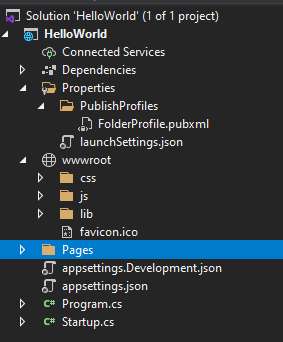
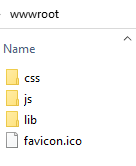
Note that we have some different structure changes for ex , “wwwroot” folder and also some new files like “appsettings.json”
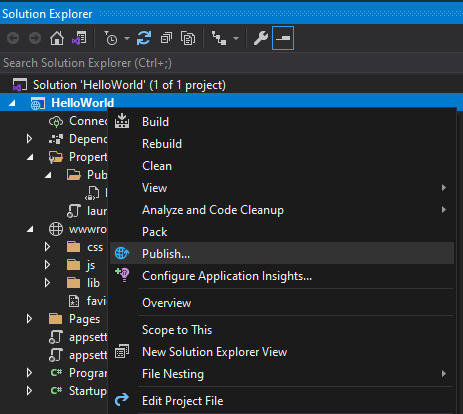
We won’t make any changes, but we will Publish this website
The Structure
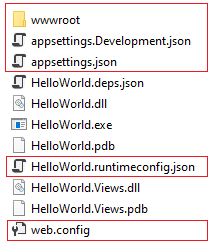
Now let’s dig into the new structure of the website, we already saw some differences in the project and we now see these changes reflected in the deployed files.
the first thing you may notice its the /bin folder is not present, and most of the files seem to be on the same folder level. also, your website now has a “.exe” file, we can also see the “wwwroot” folder
wwwroot
This folder contains the .css and js files
appsettings.json
This file is an application configuration file, and it’s used to store connection strings, personalized settings , global variables, and custom keys, let’s say you would like to store a custom key, we could add it into this .json file
ex: CustomGuid”: “7f8d62e1-75af-4d2e-b50e-64d7867cad6b”
It’s also possible to add boolean values ex : “EnableExperienceEditor” : true
{
  "Logging": {
    "LogLevel": {
      "Default": "Information",
      "Microsoft": "Warning",
      "Microsoft.Hosting.Lifetime": "Information"
    }
  },
  "AllowedHosts": "*"
}
web.config :
We can see some things been set up on this file, we see the handler “AspNetCore” and see also a reference for the main dll of the project “.\HelloAspNetCore.dll”, we also see some parameters “stdoutLogEnabled” and also “stoutlogFile”, in this case, the log its disabled, but you can set Enable, and the default folder for the logs are also editable.
This file is only used when you are deploying in IIS Server
<?xml version="1.0" encoding="utf-8"?>
<configuration>
  <location path="." inheritInChildApplications="false">
    <system.webServer>
      <handlers>
        <add name="aspNetCore" path="*" verb="*" modules="AspNetCoreModuleV2" resourceType="Unspecified" />
      </handlers>
      <aspNetCore processPath="dotnet" arguments=".\HelloWorld.dll" stdoutLogEnabled="false" stdoutLogFile=".\logs\stdout" hostingModel="inprocess" />
    </system.webServer>
  </location>
</configuration>
<!--ProjectGuid: EF4D2D1D-1CEC-4E3B-80C7-F649366067FC-->.netruntimeconfig:
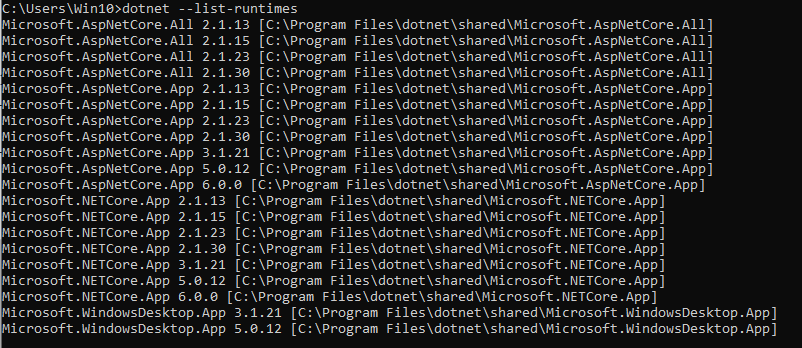
Here we can see a “.json” file with some configuration related to the Framework, here we can see the version “3.1.0” it’s being used.
in order to know which ones you have installed locally, you can run the following command on cmd
dotnet –list-runtimes
{
  "runtimeOptions": {
    "tfm": "netcoreapp3.1",
    "framework": {
      "name": "Microsoft.AspNetCore.App",
      "version": "3.1.0"
    },
    "configProperties": {
      "System.GC.Server": true,
      "System.Runtime.Serialization.EnableUnsafeBinaryFormatterSerialization": false
    }
  }
}
Now, copy over to IIS and Run the website
If you were able to go this far it means that all the steps worked and your first ASP .NET CORE is running smoothly. Is it my first ? maybe not….

Exploring another website
As previously stated, we have a Sitecore 10 instance on this IIS running already, therefore, we have “Identity Server ” running
Let’s make an exercise an open IIS and do a quick overview of those files

After opening this folder, you will see the identity server files and configurations, now that you are familiar with the files, we shall see a very similar structure, however, with much more DLLs

Let’s take a look at this web.config
We will see almost an identical configuration to our previous demo, and the only difference it’s the reference to “.\Sitecore.IdentityServer.Host.dll” . so now you know that ASP .NET CORE it’s already being used by you and you have the basis to understand how this works !
See you in the next article
<?xml version="1.0" encoding="utf-8"?>
<configuration>
  <location path="." inheritInChildApplications="false">
    <system.webServer>
      <handlers>
        <add name="aspNetCore" path="*" verb="*" modules="AspNetCoreModule" resourceType="Unspecified" />
      </handlers>
      <aspNetCore processPath="dotnet" arguments=".\Sitecore.IdentityServer.Host.dll" stdoutLogEnabled="false" stdoutLogFile=".\logs\stdout" />
    </system.webServer>
  </location>
</configuration>
<!--ProjectGuid: 411a84e3-bdaa-45d8-89a2-b47670e591eb-->
You must be logged in to post a comment.